Introduction to React: learn how to make your UI dynamic and awesome!
Corentin de Boisset9 min read

What is React?
According to its developers, React is a JavaScript library for creating user interfaces. It is designed to solve one problem: building large applications with data that changes over time. It has had an ultra-fast success lately and is used in many famous websites like Facebook, Instagram, Netflix, AirBnb, BBC, Dailymotion, Deezer, Docker, Dropbox, IMDb, Paypal, Reddit, WhatsApp, Yahoo and many more.
That’s a nice piece of information but it does not answer the questions a programmer would ask himself in the first place: when should I use this library? Why is it better than others, and why should I change? What are the buisness benefits of using it? Is it easy to learn? Is it easy or fast to use?
Sadly, most of these questions should be answered by personal experience: try and you’ll see. What we can do here however, is to take a look at the library and then try to understand the trend it has had lately.
So, to introduce React, the best description is: It is a view layer.
Only a view layer.
Basicaly, React is made to build “components”, a number of functions, variables with a template, bundled together into a self-contained, independent, reusable brick that renders into HTML with all the javascript necessary for the user interactions. For those who are used to deal with Angular 1.x, React components are comparable to directives in many ways. This last point is the reason why full MVC frameworks like Angular or Backbone can not be compared with React. React is only made to build views, not to handle the rest of the logic necessary in a complete front-end app, for instance making calls to a server, sharing data between components or emiting/receiving application-wide events.
The answer given by Facebook to have this logic around React, is a Pattern calld Flux, which will be the subject of another post.
How do I use React?
React key concepts are props and state, they are two attributes present in every component and contain particular data. On the one hand, props are data passed from the outside. Every time the props change a rendering of the component is triggered (but the component is not reinitialized). On the other hand, the state is where the variables that define the status of the component are stored. They can be updated from within the component with the setState method, also present in every component, which updates the state and re-renders the component
But no more awaiting, let’s make a component to see the key features of the library: an orderable and interactive column of cards!
To bootstrap the project, we will use webpack (React works extremely well with webpack’s CommonJS system). Here is the package.json:
// package.json
{
  "dependencies": {
    "babel-core": "6.4.5",
    "babel-loader": "6.2.1",
    "babel-preset-es2015": "6.3.13",
    "babel-preset-react": "6.3.13",
    "react": "0.14.7",
    "react-dom": "0.14.7",
    "webpack": "1.12.12",
    "webpack-dev-server": "1.14.1"
  },
  "babel": {
    "presets": [
      "es2015",
      "react"
    ]
  }
}
The tree will look like this:
webpack.config.js
package.json
.
├─ src/
│   ├── app.jsx
│   ├── cardList.jsx
│   └── card.jsx
└─ www/
    └── index.html
Wait, what?! app.jsx? What is JSX?
JSX is a templating language used in the rendering functions of React components, it enables to have an XML-like formatting that makes really easy to see how the component will render. It is transpiled into vanilla javascript to be executed in a browser: for instance, return <div><div> will become return React.createElement('div'). It is possible to use make components with only javascript but the code is much more dense and wordy. More information about the JSX specs here.
So, webpack will be configured to transpile our components into javascript before making our bundle. The config file will be like this:
// webpack.config.js
var path = require("path");

module.exports = {
  entry: "./src/app.jsx",
  output: {
      path: path.join(__dirname, "www"),
      filename: "bundle.js",
  },
  devtool: "inline-source-map",
  module: {
    loaders: [
      {
        test: /\.jsx?$/,
        exclude: /(node_modules|bower_components)/,
        loader: "babel",
      },
    ]
  },
  resolve: {
    extensions: ["", ".js", ".jsx"],
  },
  devServer: {
    contentBase: "www/",
    inline: true,
    colors: true,
    progress: true,
  }
};
An index.html needs to be put in the www/ directory to fetch the static data like the bundle.js file:
<!-- www/index.html-->
<!DOCTYPE html>
<html>
  <head>
    <meta charset="UTF-8" />
    <title>Hello React</title>
  </head>
  <body>
    <div id="baseElement"></div>
    <script src="/bundle.js"></script>
  </body>
</html>
Now the app.jsx is the entry point of our configuration, it will import all our dependencies (React also works extremely well with es6):
// src/app.jsx
import React from 'react'
import ReactDOM from 'react-dom'

import CardList from './cardList.jsx'

let cards = [
    {'name': 'Super card', 'id': 1},
    {'name': 'Other card', 'id': 2},
    {'name': 'Last card', 'id': 3}
];

ReactDOM.render(<CardList cards={cards} />, document.getElementById("baseElement"))
The interesting part is this last line: ReactDOM is a sub-library of React wich is only aimed at attaching a component to a part of the current DOM and rendering the component. It also have a serverside counterpart that can be used to pre-render components directly in the server, but we will see that later.
Now that our app is all ready to be started, let’s start the React stuff. Here is a simple version of our cardlist component:
// src/cardList.jsx
import React from 'react'

class CardList extends React.Component {
    render() {
        let elements = this.props.cards.map((element) => {
            return (<li key={element.id}>{element.name}</li>)
        })
        return <ul>{elements}</ul>
    }
}

export default CardList
Let’s start a webpack-dev-server to see how that renders:
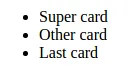
<div id="baseElement">
    <ul data-reactid=".0">
        <li data-reactid=".0.0">Super card</li>
        <li data-reactid=".0.1">Other card</li>
        <li data-reactid=".0.2">Last card</li>
    </ul>
</div>
Such list, very templating, wow!
By what kind of sorcery is all that working? Well first, we extended here a base Class of React that builds components. And what about this render() method? It is a method required in each component that is called every time the components needs to be processed into HTML and subsequent Javascript. In there we create an array of <li>s, each containing a card title. We can point out that variables have to be put inside brackets {}. Finally, we put this array in a <ul> element, and React will render all contained elements one after the other.
Also, there are a lot of data-reactids, they are attributes necessary for the core of the library, and they should not be touched by any piece of the application, not even for styling!
Here we go, we have a list of all our card names in a bullet list!
But we talked about some state earlier, why is it not used? Well this component is very simple, it is only a function to render some data, no user interaction will edit the apparence. A component like this is dumb in two ways: in its way of working, but also because using React for a component simple like this is. What we need is some user interaction ! We will enable the user to choose the order of the cards by adding some up/down arrows to move up or down cards.
So, the component will start by copying the list of cards of the props into the state by editing the component to look like this:
    constructor(props){
        super(props)
        this.state = props
    }
    render() {
        let elements = this.state.cards.map((element) => {
            return (<li key={element.id}>{element.name}</li>)
        })
        return <ul>{elements}</ul>
    }
This is necessary if we want to edit the data, since the props are immutable. Now, if we edit the state, the rendering will be affected accordingly.
We will now add a function to change the order of a particular card:
    moveCard(from, to){
        cards = this.state.cards
        movedCard = cards.splice(from, 1)
        cards.splice(to, 0, movedCard)
        this.setState({
            cards: cards
        })
    }
The beginning of this function is pretty straightforward, we copy the list and change the order of a particular item. The major concept to remember is the this.setState. This function is the only way that should be used to edit the state. It replace the items given in arguments, and triggers a render() to apply the modification to the DOM.
We need to bind the arrows onclick events with moveCard. The rendering function will then look like:
    render() {
        let elements = this.state.cards.map((element, index) => {
            return (
                <li key={index}>
                    {element.name}
                    <span onClick={() => this.moveCard(index, index-1)}>Up</span>
                    <span onClick={() => this.moveCard(index, index+1)}>Down</span>
                </li>
            )
        })
        return <ul>{elements}</ul>
    }
Notice that the onClick syntax is different from the html standard onclick. The reason is that React uses a cross-browser type of event, with the same methods on all browsers. The list of available events and further information can be found here
Another special attribute is className that computes into the basic HTML class. This is mandatory to handle the styling.
And if we look at the browser, it works! Only thing, there is a down arrow even on the last card, and an up arrow on the first card. Clicking them make the javascript crash. We will then add some conditions:
    render() {
        let elements = this.state.cards.map((element, index) => {
            return (
                <li key={index}>
                    {element.name}
                    {
                        index != 0 ? <span onClick={() => this.moveCard(index, index-1)}>Up</span> : ''
                    }
                    {
                        index != this.state.cards.length -1 ? <span onClick={() => this.moveCard(index, index+1)}>Down</span> : ''
                    }
                </li>
            )
        })
        return <ul>{elements}</ul>
    }
React does not have a ng-if-like function to have conditionnal elements, here is the reason with some examples to have the right behavior.
React is made to have as small components as possible, let’s cut this big component to simplify all this. The new component will look like this:
The final cardList is:
// src/cardList.jsx
import React from 'react'
import Card from './card'

class CardList extends React.Component {
    constructor(props){
        super(props)
        this.state = props
    }
    moveCard(fromIndex, toIndex) {
        let cards = this.state.cards
        let movedCard = cards.splice(fromIndex, 1)[0]
        cards.splice(toIndex, 0, movedCard)
        this.setState({
            cards: cards
        })
    }
    render() {
        let elements = this.state.cards.map((element, index) => {
            let moveUp, moveDown;
            if (index != 0)
                moveUp = this.moveCard.bind(this, index, index-1)
            if (index != this.props.cards.length - 1)
                moveDown = this.moveCard.bind(this, index, index+1)
            return (
                <Card
                    key={index}
                    card={element}
                    moveUp={moveUp}
                    moveDown={moveDown}
                />
            )
        })
        return <ul>{elements}</ul>
    }
}

export default CardList
And our new card is:
// src/card.jsx
import React from 'react'

class Card extends React.Component {
    render() {
        return (
            <li>
                {this.props.card.name}
                {
                    this.props.moveUp ? <span onClick={this.props.moveUp}> Up</span> : ''
                }
                {
                    this.props.moveDown ? <span onClick={this.props.moveDown}> Down</span> : ''
                }
            </li>
        )
    }
}

export default Card
Our component is now quite advanced, we could also add a lot of sugar around it, like adding an <input /> to add some new cards, or adding some styling around this basic HTML-only component.
And… That’s it!
Well, that’s it for the first chapter on the React and Flux serie. Now that we have the bases to build React components, we will use them to create a complex multi-component system to integrate in a real page.
I hope this litle tutorial could help you understand React better. If you liked this, keep up to date for the oncoming second part about the Flux architecture.
More to read about the subject can be found here:
- React developer tools, a must have to work on components: https://chrome.google.com/webstore/detail/react-developer-tools/fmkadmapgofadopljbjfkapdkoienihi?hl=en
- React’s documentation: https://facebook.github.io/react/docs/getting-started.html
- A very good article that also explains React basics: http://blog.andrewray.me/reactjs-for-stupid-people/
- The ES2015 specifications: http://babeljs.io/docs/learn-es2015/
- A good setup of webpack to work with React: https://robots.thoughtbot.com/setting-up-webpack-for-react-and-hot-module-replacement